Packed with three kinds of cheese, these Tiropitakia aka Greek cheese hand pies, are crispy, cheesy and seriously moreish. They’re so easy to make that even I can make them and bonus points, they’re baked, not fried!
It all started when we planned a Greek-themed lunch with our friends to celebrate our upcoming holidays to the Greek islands. I couldn’t decide what to make so of course, I went straight to the source and hit up my friend Valentina, who is Greek and one of the most amazing cooks I know. I asked her what I could make that was yummy, simple and guaranteed to go down well. Valentina suggested these little cheese triangles because in her words, they’re easy and everyone loves them. Let me tell you friends, Valentina wasn’t wrong!
In case you’re wondering, these little pies get their name from tiropita, which is the Greek word for a cheese pie. Tiropitakia is simply the mini version. We saw both big and small versions while we were in Crete and all sorts of shapes too. While we were in Crete, I enjoyed these pies so much so I’m totally stoked that I can now make my own at home. And now you can make them too!

The hero ingredient is, of course, the cheese. Traditionally, tiropita can include Kefalotyri cheese but as it can be hard to track down, I followed Valentina’s advice and used halloumi instead. My version uses feta, ricotta and halloumi, giving the filling a lovely combination of salty, creamy and slightly chewy. Let’s face it, everything tastes better with halloumi!
I used chilled filo to make these triangles and honestly, working with the pastry was surprisingly easy. The trick is to bring the filo to room temperature before you start, cover the sheets with a piece of baking paper and then a damp kitchen towel to stop them from drying out and work quickly once you get going.
If you’re short on time or filo isn’t your thing, you can also make these with puff pastry. It’s definitely not as authentic but it’s certainly quicker and just as delish. Simply cut the puff pastry into strips, add the cheese filling and fold once into triangles or squares before baking until golden and puffed.

Apart from being off-the-charts yum, one of the best things about these little pies is that you can make them ahead of time. If you’re making them the day before, simply assemble the tiropitakia, cover them with cling film and pop them in the fridge ready to bake the next day. You can also freeze them unbaked and cook them straight from frozen whenever you’re ready. No need to defrost, just pop them in the oven and enjoy!
They’re perfect for entertaining because you can make a batch of these babies and they will both please a crowd and feed a crowd! So, if you’re looking for a simple Greek-inspired snack, something for a mezze spread or just an excuse to eat some cheese, these Tiropitakia could be just the ticket!
Do you have a friend like Valentina who always has the perfect recipe up their sleeve? If you were going to a bring-a-plate Greek lunch, what would you make apart from these, of course?!
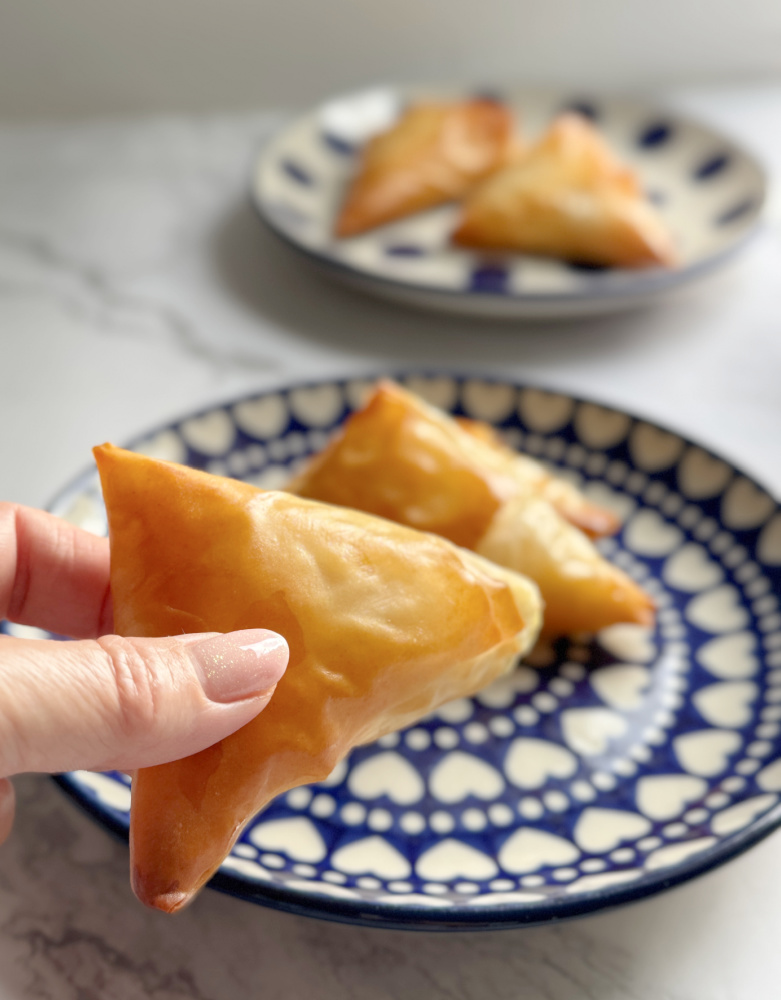
Makes about 25-30 pies
Ingredients
200g feta cheese, crumbled
200g fresh ricotta
200g halloumi, coarsely grated
2 eggs, beaten
18 sheets filo pastry (I used Marks and Spencers)
150g butter, melted (or extra virgin olive oil)

How to
- Preheat the oven to 180°C and line a couple of baking trays with baking paper. Allow the filo pastry to come to room temperature. This should take about 10 minutes. Then, lay the pastry out, cover with a piece of baking paper and then a damp tea towel to stop it from drying out.
- Make the filling. Place the crumbled feta, ricotta and roughly grated halloumi in a large bowl and add the beaten eggs.Gently mix everything together until well combined.
- Now we’re ready to get our pie on! Take 1 sheet of filo with the longest edge facing you. Brush it with melted butter and lay another sheet on top. Repeat the process until you have 3 sheets layered together, with butter brushed between each sheet.
- Depending on the width of your filo, cut the pastry into 4 or 5 equal vertical strips, each approximately 8cm wide.Place a tablespoon of the cheese mixture at the base of each strip, leaving a few centimetres of pastry around the filling, and press down lightly. Don’t try to squeeze too much filling into each pie otherwise it will ooze out during cooking!
- Fold the filo diagonally over the filling to form a triangle, then continue folding the triangle over itself all the way up the strip, keeping the triangle shape as you go. If you have any excess pastry at the end, don’t worry. Just tuck it in and brush with a little extra butter to seal.
- Continue with the remaining filo and filling. You should get about 25–30 pies. If you want to freeze the tiropitakia, place them on a baking tray in a single layer and freeze until solid. Once frozen, transfer them to a freezer bag or airtight container.
- To enjoy the tiropitakia now, place the triangles on the prepared baking trays and brush the tops with melted butter. Bake for about 20 minutes, until golden brown and crisp.Remove from the oven and allow to cool slightly before serving. They’re also delicious served at room temperature.
Note: To cook the tiropitakia from frozen, bake from frozen on sheets, brushing the tops with olive oil or melted butter until golden for 30-45 minutes.