A few weeks ago I was invited to an event. It was called Make It Merry. It was an event presented by Spotlight. And it was all about Christmas. That’s a hat trick of happiness right there.
Have you ever been to Spotlight? It’s a veritable Aladdin’s Cave I tell you. I don’t think there’s anything that shop doesn’t sell, and if you’re into baking or making, well, let’s just say it’s about as close to retail heaven as you’re going to get.
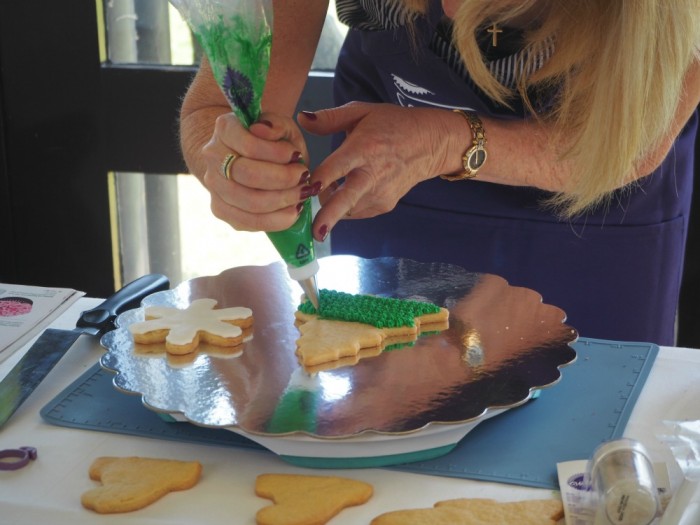
As you know I haven’t got a crafty bone in my body so I spent the lion’s share of my time at the cake decorating table where I made it very merry and learned all things fondant. Actually, if the truth be told, I have a fear of fondant which is why I have never used it but those lovely ladies from Zorratto Enterprises showed me four ways fondant can be my friend.
1. Play nice with your fondant
Dust your hands and your board with cornflour using one of these nifty dusting pouches. Keep the atmosphere as cool as you can – crank up the air conditioning! Roll out only the fondant that you need, keep the remainder tightly wrapped in cling film so that it doesn’t dry out.
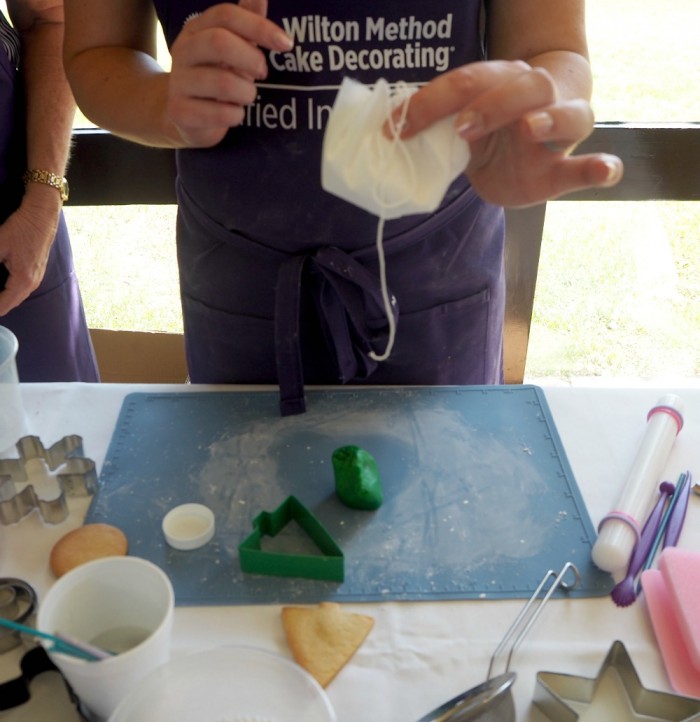
2. Get the right tools for the job
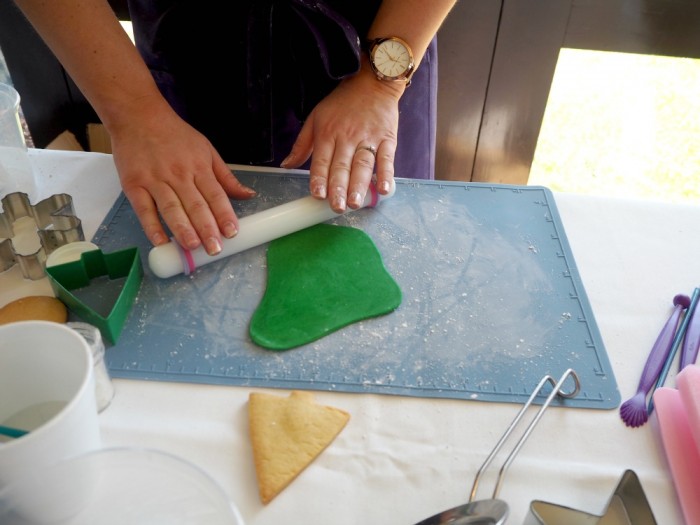
Using a fondant rolling pin allows you to get a smooth surface and removing or adding the coloured rings, allows you to determine the thickness of the fondant.
Use tweezers to add your decorations.

3. Fondant is your friend.
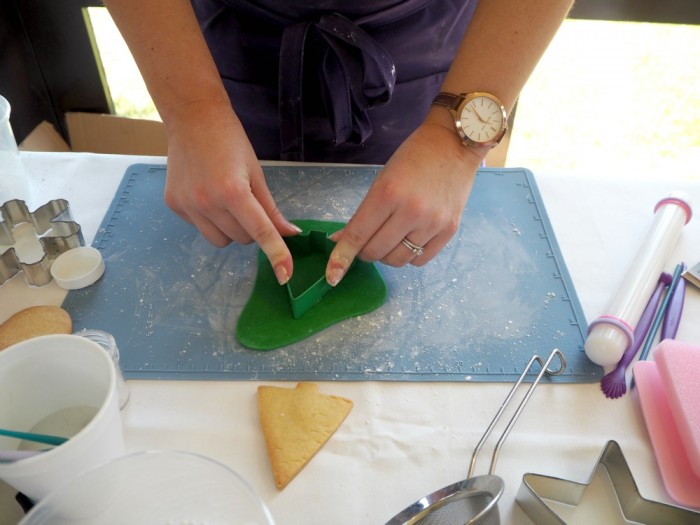
Decorating cookies with fondant is as simple as rolling, cutting and placing the fondant atop the cookie.
4. You can do a lot with a steady hand
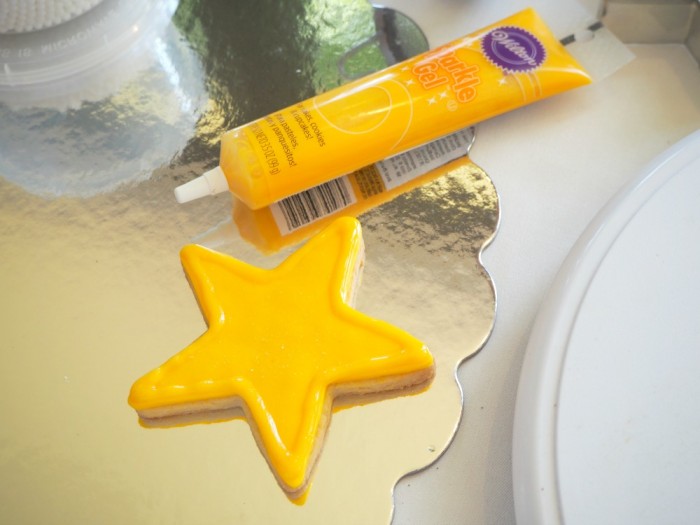
This sparkle gel was one of my favourites. It’s gorgeous and glittery. Look how lovely this looks!
There are so many things in stock at Spotlight to help you decorate like a boss! I mean this is just a sample selection!

The decorating icing is my favourite because icing bags are my nemesis. At this rate, I’ll be making a guest appearance on Cake Boss!
In fact, it was this giant cookie of awesome that inspired me to get my bake on. So I hotfooted it down to Spotlight, purchased my essentials and off I went on a flight of fondant fancy.
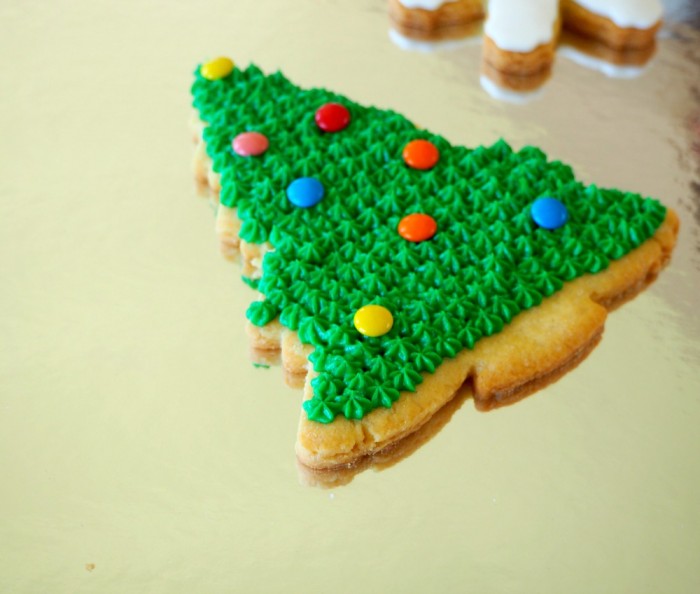
I didn’t make that giant cookie of awesome but I did make these smaller Christmas Tree Cookies and they what they lack in size, they make up for in taste and Christmas cuteness. It just goes to show, size is not everything! Now, because it’s Christmas and Christmas is all about giving, I’m being twice as nice and giving you the traditional cookie recipe and the Thermomix conversion.

Christmas Tree Cookies
Makes 12-15 iced cookies (plus extra uniced cookies)
When it comes to baking, I always defer to the domestic goddess herself, Nigella. She never lets me down and these cookies are no exception, even when I converted the recipe to the Thermomix. You’ll need to grab yourself some Christmassy cutters and don’t forget the ready to roll fondant, it’s a game changer. These cookies are as cute as they are tasty and they’re so easy, the kids can make them.
Ingredients
90g soft unsalted butter
100g caster sugar
1 large egg
1/2 teaspoon vanilla extract
200g plain flour
1/2 teaspoon baking powder
1/2 teaspoon salt
200g ready to roll green fondant icing
1/4 cup warmed strawberry jam
1 pack of mini M&Ms
How to – Traditional
- Preheat oven to 180C /160C fan-forced. Line two baking trays with baking paper.
- Cream the butter and sugar until pale and then beat in the egg and vanilla.
- In a separate bowl, combine the flour, baking powder and salt. Add the dry ingredients to the butter mixture and mix gently.
- If the mixture seems too sticky, you can add a little more flour but do so with caution, because too much flour will make a tough dough. Bring the dough together, make a fat disc, wrap in cling film and put in the fridge for at least an hour.
- Sprinkle your surface with flour, place the dough on it and sprinkle a little more flour on top. Roll the dough out to a thickness of about 0.5cm. Cut out the shapes, dipping the cutter into flour each time. Place the cookies onto the baking tray leaving some space between each one.
- Bake for about 8-12 minutes (depending on size and shape of cookie) until golden around the edges. Don’t worry if they’re a bit soft in the middle, they’ll set as they cool.
- Using a spatula, carefully transfer to a wire rack. Allow to cool completely before icing.
- Lightly flour your board and hands with cornflour using a dusting pouch. Using a fondant rolling pin roll the fondant to the desired thickness. Only use a small amount of fondant each time. Keep the remainder tightly wrapped in cling film so that it doesn’t dry out. Using a small pastry brush, lightly brush a cookie with jam and use a cutter to cut out the fondant shape.
- Gently lift the fondant cut out and place it on top of the cookie. Don’t stress, if it doesn’t fit exactly, you can use your fingers to stretch and smooth it out. Repeat with all the other cookies.
- When each cookie is covered in fondant, you can decorate with M and Ms. Use a small brush or the tip of your little finger to wet the fondant in random spots and using tweezers gently press an M& into an each one. Don’t apply too much water or get the candy wet because you don’t want the colour to run! Don’t forget to place a yellow one at the top of the tree!
How to – Thermomix
- Preheat oven to 180C /160C fan-forced.Line two baking trays with baking paper.
- If using raw sugar, weigh into the bowl and mill for 5 seconds on speed 9.
- Place the butter and sugar into TM bowl and mix for 10 seconds on speed 4.
- Add the egg, vanilla, flour, baking powder and salt and mix for 15 seconds on speed 4.
- Knead for 45 seconds on interval speed. Bring the dough together, if the mixture seems too sticky, you can add a little more flour but do so with caution, because too much flour will make a tough dough. Shape the dough into a fat disc, wrap in cling film and put in the fridge for at least an hour.
- Sprinkle your surface with flour, place the dough on it and sprinkle a little more flour on top. Roll the dough out to a thickness of about 0.5cm. Cut out the shapes, dipping the cutter into flour each time. Place the cookies onto the baking tray leaving some space between each one.
- Bake for about 8-12 minutes (depending on size and shape of cookie) until golden around the edges. Don’t worry if they’re a bit soft in the middle, they’ll set as they cool.
- Using a spatula, carefully transfer to a wire rack. Allow to cool completely before icing.
- Lightly flour your board and hands with cornflour using a dusting pouch. Using a fondant rolling pin roll the fondant to the desired thickness. Only use a small amount of fondant each time. Keep the remainder tightly wrapped in cling film so that it doesn’t dry out. Using a small pastry brush, lightly brush a cookie with jam and use a cutter to cut out the fondant shape.
- Gently lift the fondant cut out and place it on top of the cookie. Don’t stress, if it doesn’t fit exactly, you can use your fingers to stretch and smooth it out. Repeat with all the other cookies.
- When each cookie is covered in fondant, you can decorate with M and Ms. Use a small brush or the tip of your little finger to wet the fondant in random spots and using tweezers gently press an M& into an each one. Don’t apply too much water or get the candy wet because you don’t want the colour to run! Don’t forget to place a yellow one at the top of the tree!
A big, festive thank you to Kid’s Business and Spotlight for all the festive fun and helping me get my fondant on. I couldn’t have done it without you.