If you love candy but you don’t love cake decorating, then this is the cake for you! It looks sensational, it’s the ultimate sweet treat and the lollies cover up any decorating disasters!
Actually, I first made this cake for David when he turned 40 but thought I’d give it another go now he’s 45 and now that I’ve got a Thermomix. If David and I had a dream cake, this would probably be it because there are four layers of sponge sandwiched together with vanilla buttercream and jam for David and all the lollies for me! Here’s the one I made earlier – please pardon my terrible Instagram photo!

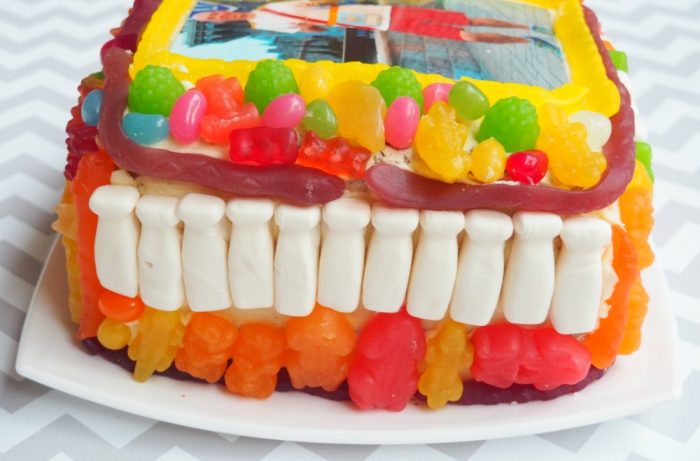
Of course, you can cover the cake in whatever candy you choose, and if the birthday person has a favourite sweetie, stack them on! Can you guess what David loves the best?
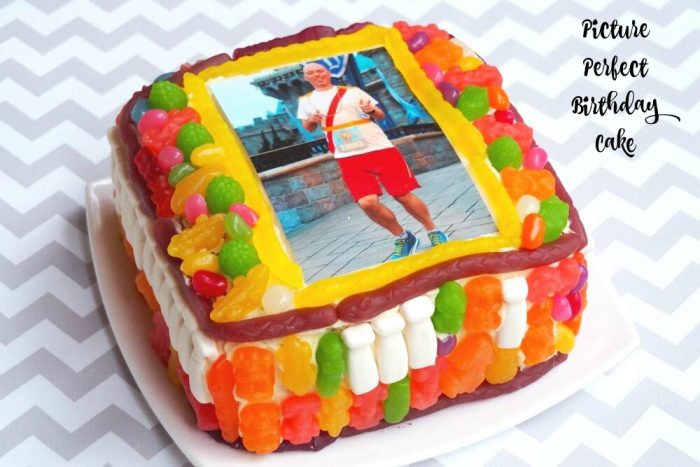
I used a square tin because it frames the photo fabulously and it’s super easy to slap on the candy. Just remember, you can use any photograph you like, but remember to laminate it if you want it to keep it after the cake has been consumed!
Clearly this cake is for those who have not quit sugar and it takes a lot of lollies, although with the quantities in this recipe, you will have lots of lollies over. Better to have too many than not enough, amirite or amirite?
Whatever candy you use to cover your cake, it will always look picture perfect.
So tell me, have you got a favourite candy?
Ingredients
FOR THE CAKE
2 x Nigella’s Buttermilk Birthday Cake (baked in 2 x deep 20cm square cake pans and halved)
FOR THE FILLING
400g strawberry or raspberry jam
FOR THE BUTTERCREAM
2 quantities of buttercream (depending on how thick you like it!)
FOR THE DECORATIONS
4×6 photograph, laminated
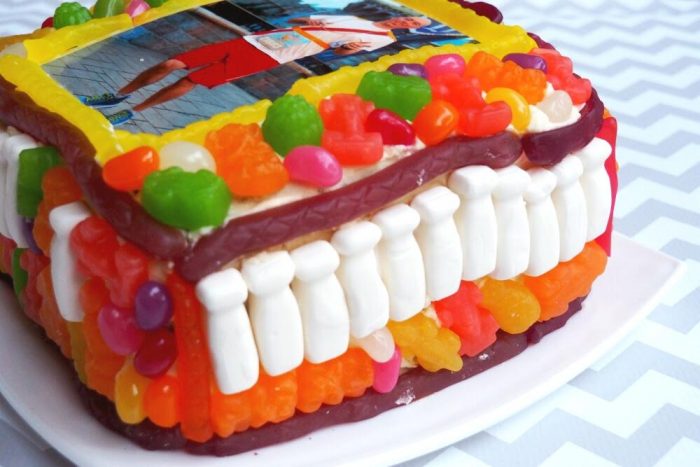
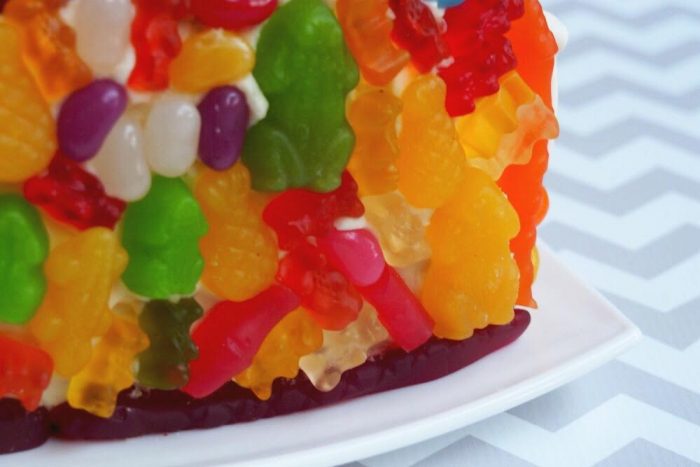
260g bag of jelly snakes
170g bag of milk bottles
190g bag of jelly beans
450g bag of party mix
How to
- Place four blobs of buttercream on a large square plate, one in each of the four corners, and one in the centre of where the cake will be. This is going to be the “glue” that holds the cake in place. Place the first layer of the cake on to the buttercream “glue.”
- Cover the cake generously with jam. Don’t spread the jam right to the edge, leave a border of about 1cm.
- Pipe the buttercream over the jam, again leaving a small border.
- To decorate, spread buttercream over the sandwiched cakes.
- Centre photograph on cake , frame with snakes. Use more snakes to line the top and bottom edges of the cake and the corners. Place the other lollies all over the cake. Press lollies gently into butter cream, filling in all the gaps until the cake is completely covered.