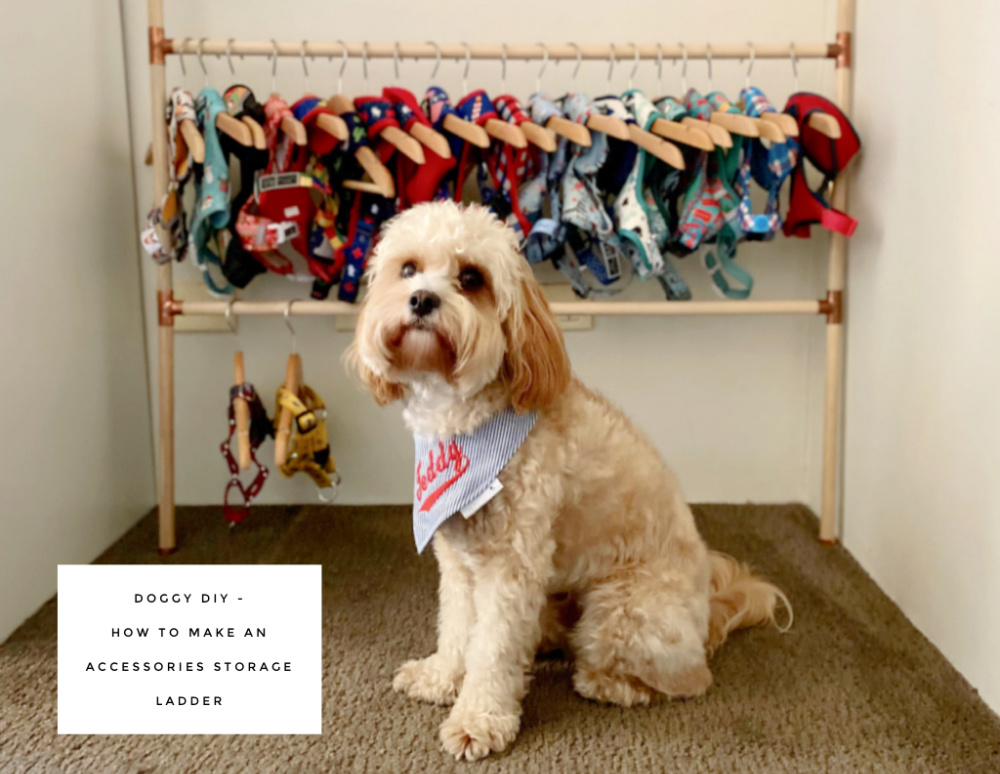
If like me you have ‘a few’ dog accessories, you’ll want somewhere to store them and this freestanding furdrobe is the pawfect storage solution!
I must say that DIY is not our strong point but this project is so easy, even “we” can do it (and when I say “we” I mean David!) It requires no skills, just a bit of elbow grease – with the sawing and sanding – and some patience while you wait for the glue to dry. I actually think that waiting for the glue to dry is the hardest part!
If you’ve got a basic tool box with a saw, sandpaper and some wood glue, all you’ll need is some dowel and copper tees. Simples!
It’s light, moveable and can be easily adapted to fit the space you have available or to accommodate the amount of accessories you have. You can also tweak the depth of the rungs to suit the type of clothes and accessories you have.
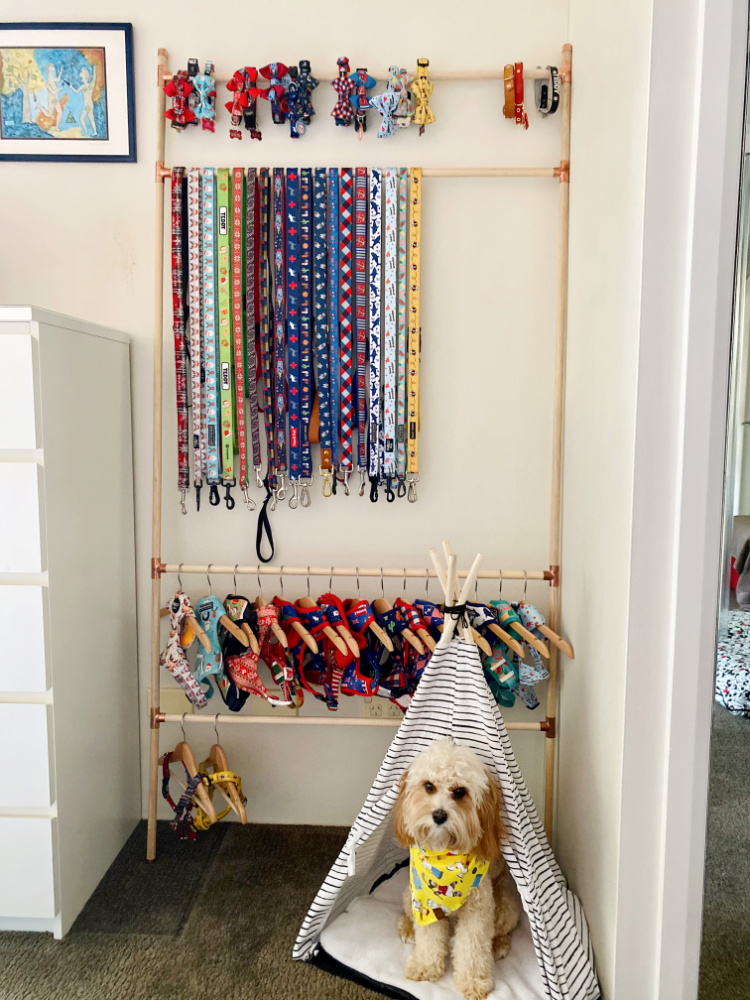
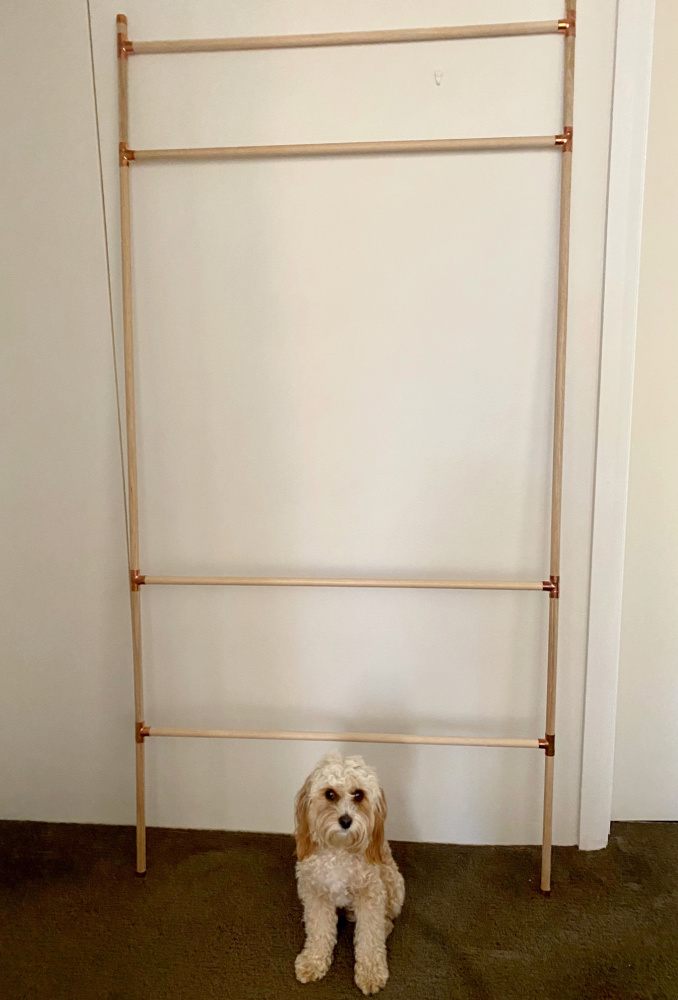
As you can see, Teddy has a rung for collars, a much deeper rung to hang leads and two equally spaced rungs for harnesses. Before you purchase materials, think about what you want to hang on the ladder and how many clothes/accessories you have. Oh, and don’t forget to allow some extra space for future pawchases… Or is that just me?!
There are lots of furdrobes on the net but none of them suited our needs and all of them were out of our budget. The beauty of this storage solution is that you can custom make it to suit you, your pup and the space you have available and it won’t break the bank!
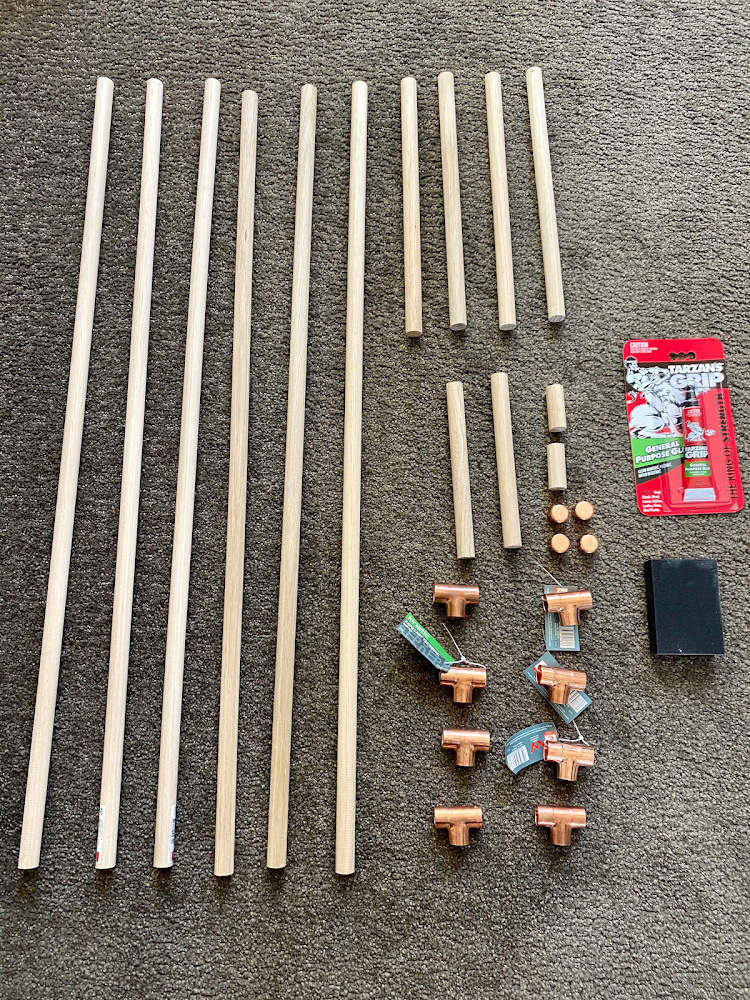
You will need
8 copper capillary tees 20x20x20mm
4 copper capillary end caps 20mm
4 x 19mm 1.8m dowel
sandpaper block
wood glue
saw (not pictured)
Let’s do it
- Measure and cut 2 of the wood dowels in half.
- Measure the remaining 2 dowels into 90cm, 33cm, 33cm, 20cm, 5cm and cut. Don’t worry the dowel is just a tad longer than 180cm.
- Start by sanding the ends of the dowel to smooth it out.
- It’s best to assemble the ladder flat and before the glue dries to make sure everything lines up, we did this flat on the ground.
- Assemble the ladder, making sure all the copper tees line up and that it is fully assembled before the glue dries. There are a number of ways you can do this: the easiest being assembling each vertical side of the ladder and then joining the cross sections before the glue dries or by assembling each rung and then joining to the vertical sides.
- Keep the ladder flat until the glue is completely dry. Then move into a standing position and display away!
Linking up with Denyse for Life This Week