
This Rocky Road wreath is all your Christmas sweet dreams come true!
This Rocky Road Wreath has been my “speciality a la maison” at recent Christmases and it’s so easy and so delicious, I don’t actually know why I haven’t posted the recipe before!
This is my go-to Christmas sweet treat because it’s easy, no bake, can be made in advance and is easily transportable – what’s not to love?!

If I’m truthful, I think the reason why I never got any great pictures of my wreaths in Christmas past was because they just never lasted long enough. Yes, dear reader, I should warn you that this Rocky Road Wreath is highly addictive! Immediately after my wreath photo shoot, I chopped up the rocky road and distributed it among my neighbours who are still telling me how good it was, weeks after the event!
Hot Christmases got me good in Australia so I really appreciated a dessert that I didn’t have to turn the oven on for. The wreath can be made up to a week ahead, just find a spot in the fridge to keep it cool until the big day. The wreath travels well too, I love taking it as my bring a plate contribution because it both feeds and pleases a crowd.
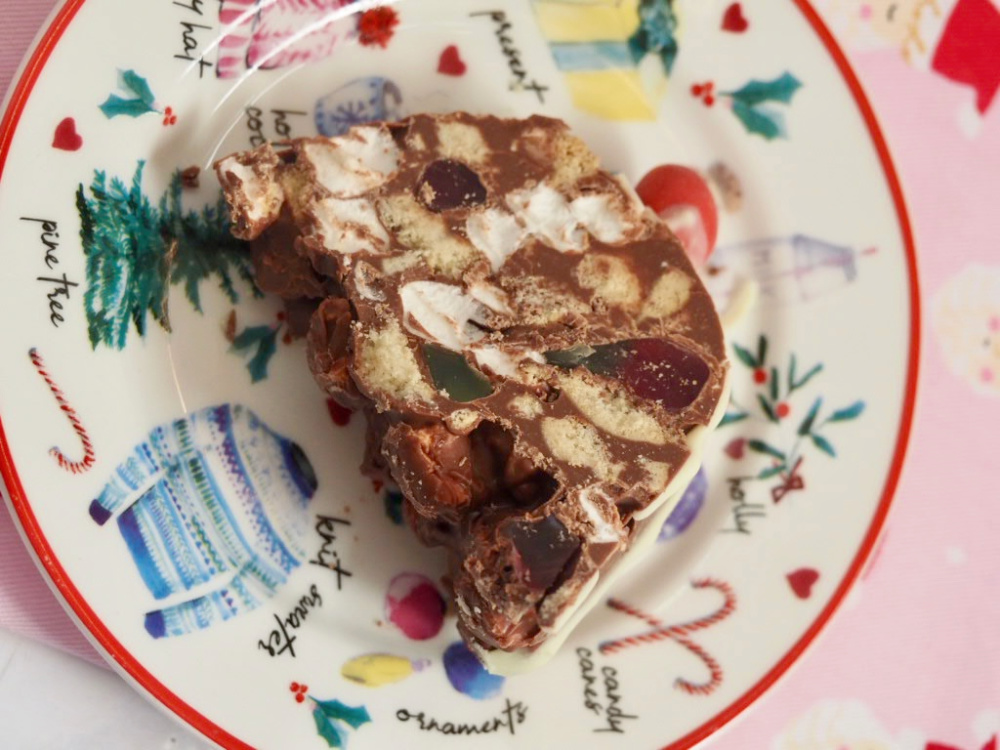
Often rocky road recipes call for dark chocolate but I’m not really a fan, milk chocolate is much more my jam. I like to use mostly milk and just a dash of dark chocolate but feel free to use your chocolate of choice, just make sure the total amount of chocolate is 700g.
You can use a regular metal bundt tin for this recipe but I find it so much easier with a silicone bundt. I grease the bundt with butter just to be sure and allow the wreath to stand for a few minutes before removing it from the bundt. I just roll sides of the bundt down, flip it over and out pops the wreath. If you’re having problems removing the wreath from the tin, just rub your hands over the outside of the tin which should warm the wreath sufficiently for it to slide out of the tin.

This is super easy to make with or without a Thermomix. I prefer to melt my chocolate in the Thermomix although I do the mixing of the chocolate and the sweets by hand just because there’s so much to mix! The other reason I love to use the thermie is that once I’ve emptied the bowl of chocolate, I can add some milk and whip up the most delicious hot chocolate drink in minutes!
This rocky road wreath is super versatile too and the flavour combinations are almost endless! Chocolate and sweets are not cheap these days so using biscuits for the crunchy element of your rocky road is a delicious and affordable choice but if you prefer use nuts instead. Marshmallows are a quintessential rocky road ingredient which in my opinion cannot be substituted – I prefer to use mini marshmallows but big ones will do, just cut them into smaller chunks.

The lolly choice in the UK is vast but quite different from the sweet offerings down under. I get quite obsessive about the colours inside my rocky road – I like to keep things Christmassy with a red, green and white colour scheme. This year I used cherry jelly sweets (red, green and totally delicious) and red and green Christmas jelly babies but in the past I’ve used raspberry jelly sweets and red and green M and Ms. Anything (sweet) goes in this rocky road! The possibilities are endless.

In Australia, I decorated my wreath with spearmint leaves and red M and Ms but I can’t source the spearmint leaves anywhere here so I just used red and green M and Ms and some Christmas decorations which I think works just as well. I promise you, this rocky road wreath is so forgiving!
And the best bit? In the unlikely event that there’s left overs, this rocky road is easy to share out and take home!
What’s your go-to Christmas sweet treat? And tell me, what would you put in your rocky road?

Ingredients
600g milk chocolate, broken into cubes
100g dark chocolate, broken into cubes
1/2 teaspoon coconut oil
180g mini marshmallows
200g shortbread biscuits, broken into chunks
130g jelly babies snowmen
100g jelly cherries
TO DECORATE
white chocolate, broken into cubes
red and green M and Ms
Edible Christmas figures (optional)

How to – Traditional
- Generously grease a bundt tin with butter.
- Combine marshmallows, biscuits and sweets in large bowl and set aside.
- Break the chocolate into pieces in a microwave safe bowl and add the coconut oil. Microwave on 50% power in 30 second bursts until completely melted, taking care not to overcook.
- Working quickly, add the chocolate to the other ingredients and stir well, making sure everything is fully coated in chocolate.
- Spoon the rocky road mixture into the prepared bundt and gently press it down with the back of a spoon.
- Pop the wreath into the fridge to set for a minimum of 3 hours.
- Let the wreath come to room temperature before removing from the bundt tin. Ease the rocky road out of the tin – if it’s a bit stuck, you can gently loosen it out with a knife or rub your warm hands over the outside of the tin to help the wreath on it’s way.
- When you are ready to decorate the wreath, break the white chocolate into chunks and place in a microwave safe bowl. Microwave on 50% power in 30 second bursts, stirring each time until melted.
- Using a teaspoon, drizzle the melted white chocolate in a zigzag pattern all over the wreath.
- To “stick” the M and Ms on the top of the wreath, place a small blob of melted white chocolate on top of the wreath, place an M and M on top and gently press down until secured. Repeat with remaining M and Ms. (Remember that the M and Ms will lose their colour in the fridge, so ideally place them on top just before serving.)

How to – Thermomix
- Generously grease a bundt tin with butter.
- Combine marshmallows, biscuits and sweets in large bowl and set aside.
- Place chocolate and coconut oil in TM bowl and chop for 10 seconds on speed 9 or until chocolate is grated. Scrape down sides of bowl.
- Melt the chocolate for 5 minutes at 50C on speed 2. Scrape down sides of bowl and melt for a further 2 minutes at 50C on speed 2, or until chocolate has melted.
- Working quickly, pour the melted chocolate into the bowl of the sweet stuff and stir well, making sure everything is fully coated in chocolate. (Before you clean the bowl, make a delicious chocolate drink by adding a cup of milk and blitzing 5 seconds on speed 8 and then heat milk for 5 minutes at 80C on speed 4.
- Spoon the rocky road mixture into the prepared bundt and gently press it down with the back of a spoon.
- Pop the wreath into the fridge to set for a minimum of 3 hours.
- Let the wreath come to room temperature before removing from the bundt tin. Ease the rocky road out of the tin – if it’s a bit stuck, you can gently loosen it out with a knife or rub your warm hands over the outside of the tin to help the wreath on it’s way.
- When you are ready to decorate the wreath, break the white chocolate into chunks and place in a microwave safe bowl. Microwave on 50% power in 30 second bursts, stirring each time until melted.
- Using a teaspoon, drizzle the melted white chocolate in a zigzag pattern all over the wreath.
- To “stick” the M and Ms on the top of the wreath, place a small blob of melted white chocolate on top of the wreath, place an M and M on top and gently press down until secured. Repeat with remaining M and Ms. (Remember that the M and Ms will lose their colour in the fridge, so ideally place them on top just before serving.)