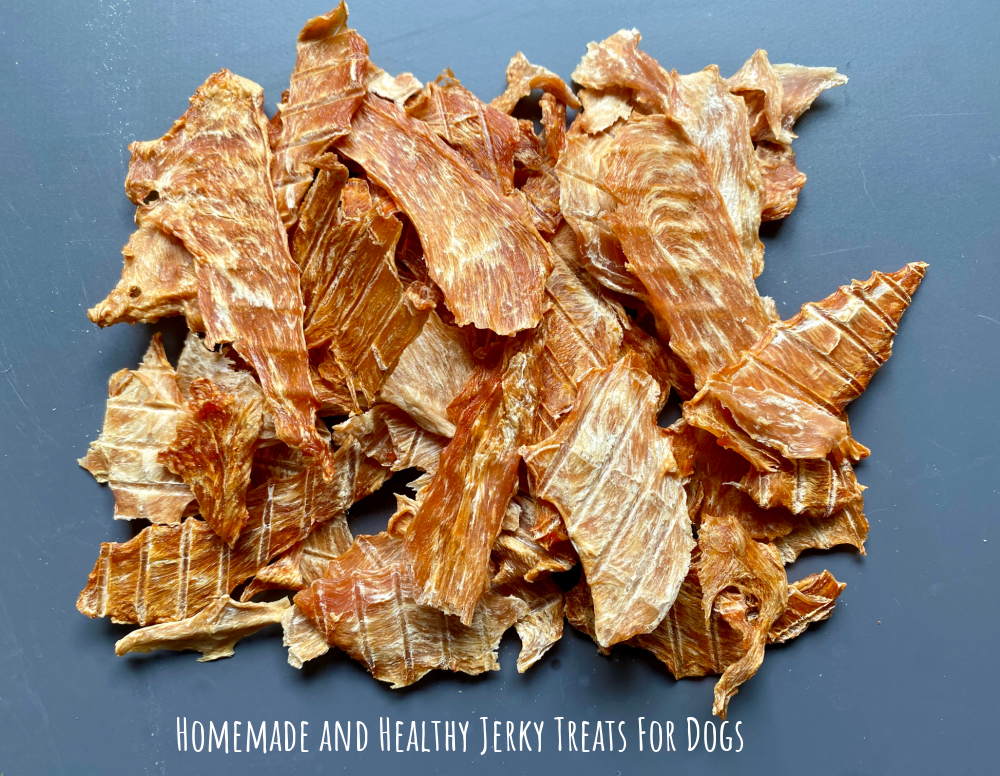
Your furry friend is going to love these healthy one ingredient dog treats that taste good and are good for them too!
Believe me when I say no one loves a treat more than Teddy Roosevelt. And no one loves giving them to him more than me… As long as they’re healthy of course!
When I became a dog pawrent, I started to really pay attention to what’s in commercially produced pet food (especially treats) and there were so many extra added ingredients.
In Australia, there was a good selection of bespoke quality dog treats but they were pretty costly so I got myself a dehydrator and made my own affordable and healthy treats.
I found similar jerky treats in the UK but many of these “all natural” dog treats also contained glycerine which really put me off. I had donated my dehydrator to a friend before I left Australia and once in the UK I invested in a Ninja Foodi with a dehydrating function so I could continue Teddy’s treat production.
Now I can make delicious, healthy and affordable treats for my pup and I know exactly what’s in them! And now I’m sharing the “how to” so you can make these one ingredient treats too!
And if your pup likes this, they’ll love my dehydrated Turkey and Pumpkin Sticks.
Why make homemade dog treats?
There are so many advantages of making your own treats. First off, your dog will absolutely love them!
They’re also super healthy because they’re meat and nothing but the meat. I usually use chicken but beef, turkey and kangaroo also work well.
This one ingredient treat only requires one ingredient… meat!
They’re also really easy to make. The most time consuming and labour intensive part is cutting the chicken but once that’s done, you can dehydrate your chicken and go.
And last but not least, not only is making your own treats very affordable, you’re in charge of the quality control.
What kind of meat can I use?
I like to use chicken breast but I’ve also used beef, kangaroo and turkey with good results.
Do I need to prep the meat in any way?
I recommend freezing meat for at least a week before dehydrating to kill off any parasites.
Do I need any special equipment to make jerky treats?
Not at all, if you don’t have Ninja Foodi with a dehydrate function or a dehydrator, you can use an oven.
If you’re using a Ninja Foodi, you’ll need to invest in some dehydrator racks.
And however you dehydrate your meat, you’ll need a sharp knife to cut it into slices.
Are the results the same whether you use a Ninja, dehydrator or oven?
However, you dehydrate your treats, the results will be the same, the only difference is the length of time it takes to dehydrate. And remember, the thicker the slices of meat, the longer they’ll take to dehydrate.
Why do you need to oven blast treats at the end?
Dehydrating alone doesn’t kill pathogens, oven blasting ensures the treats are safe for you to touch so this step benefits you, not your dog!
How much chicken should I use?
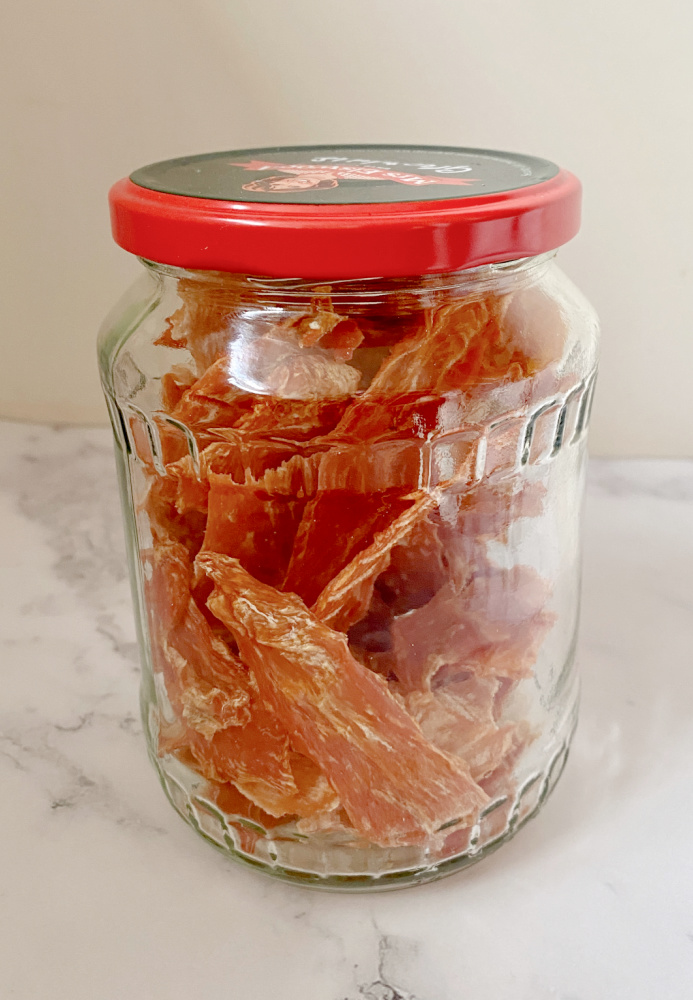
I can fit about 2 chicken breasts (around 400g) chicken breast on my Ninja dehydrator trays – making 1 big jar of chicken jerky. If you’re using an oven, you might be able to dehydrate more.
How do I store the chicken jerky?
If your dog has anything to do with it, these treats probably won’t last long. I keep Teddy’s treats in a glass jar with some uncooked rice at the bottom to absorb any excess moisture. They last about 3 weeks in the pantry. If you live in a very hot climate, you can store the jerky in the freezer for up to 3 months.

How to – In the Ninja Foodi
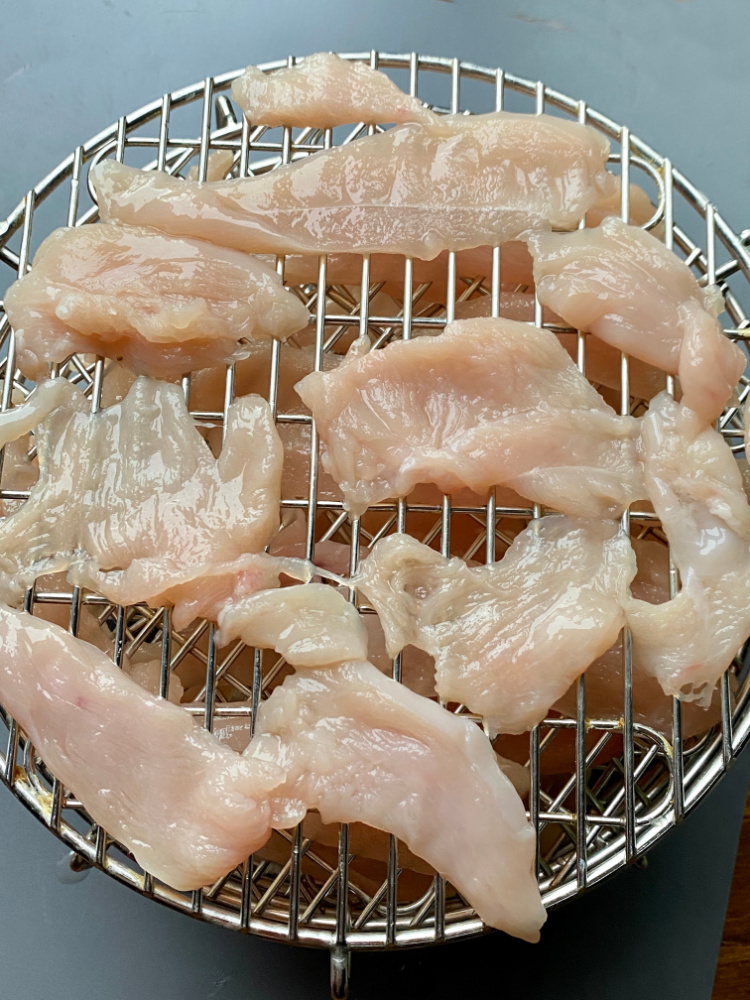
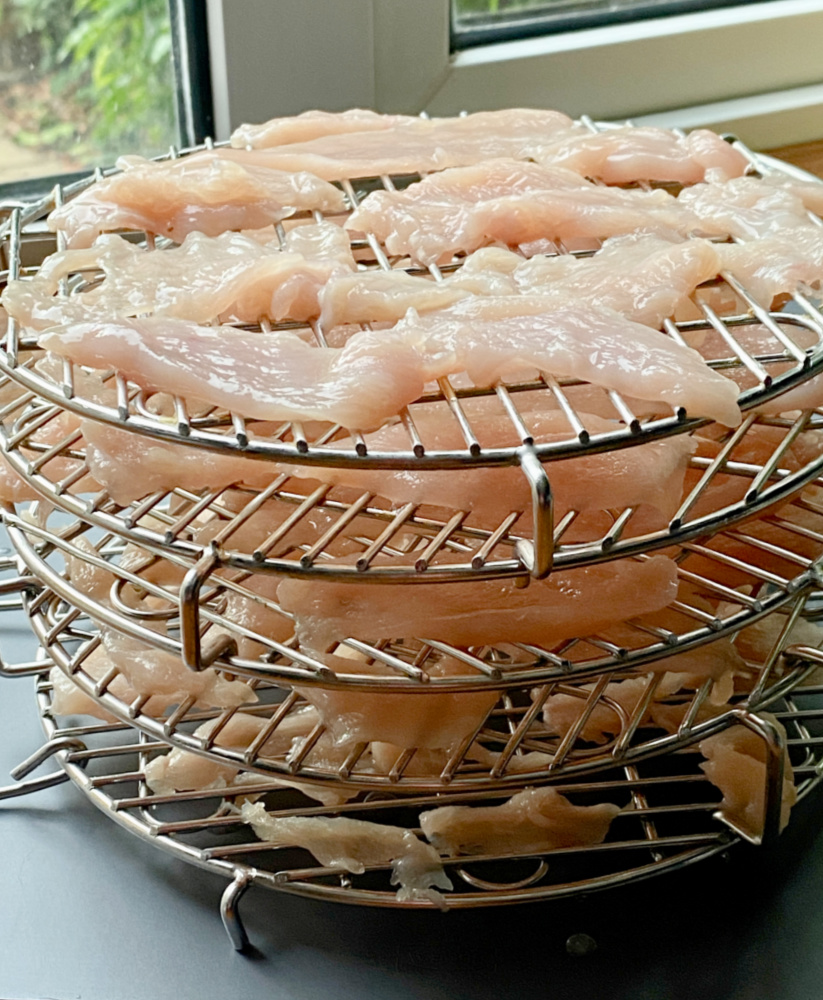
- Cut the chicken breasts into thin slices. You’ll need a super sharp knife and you will get the best results when the meat is partially defrosted.
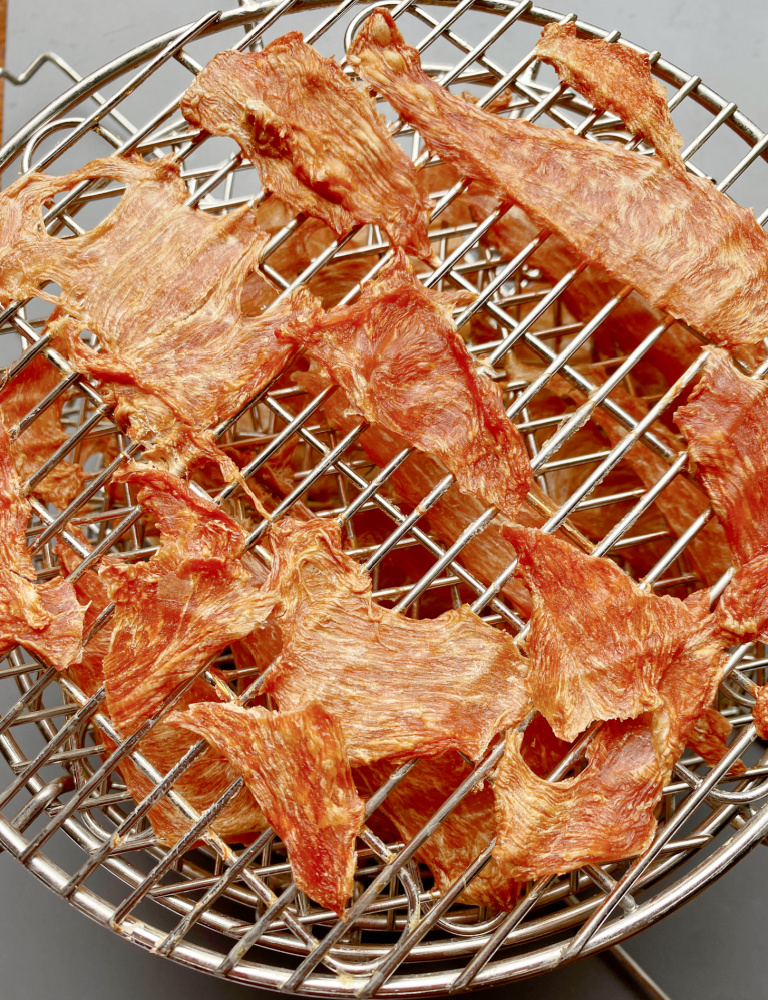
- Place the chicken slices in a single layer on the dehydrator racks.
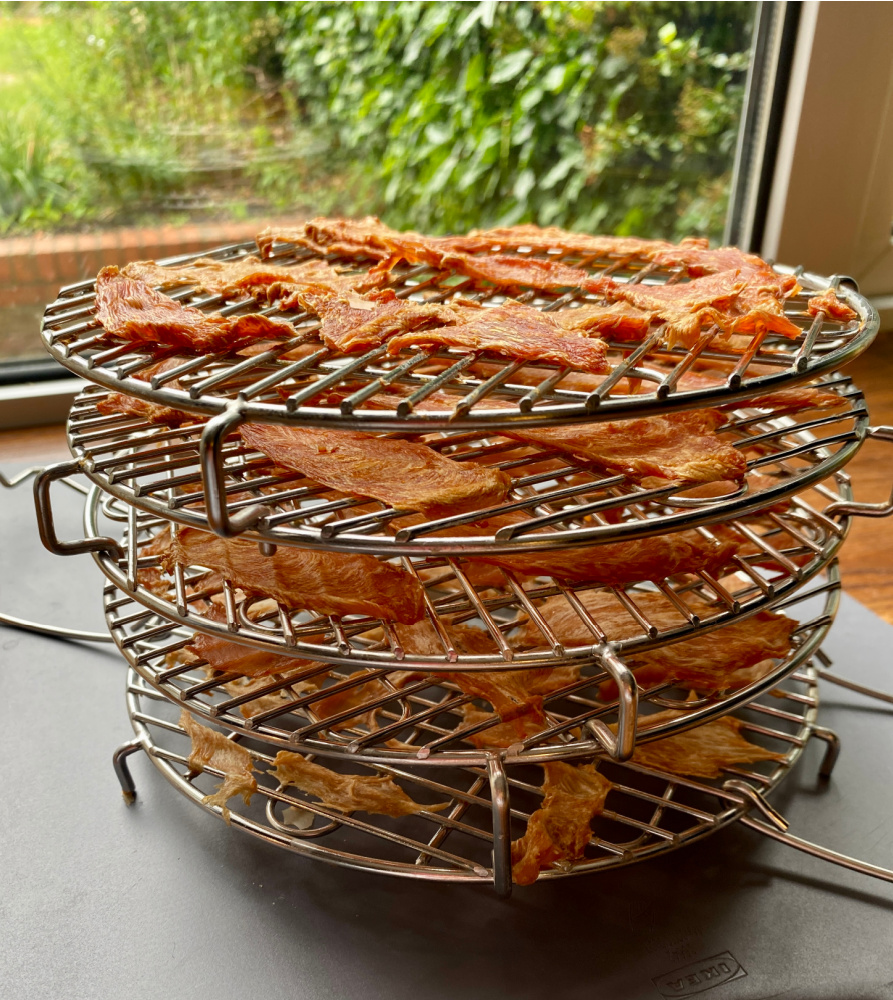
- Set the cooking function to dehydrate and the temperature to 70 degrees for 7 hours.
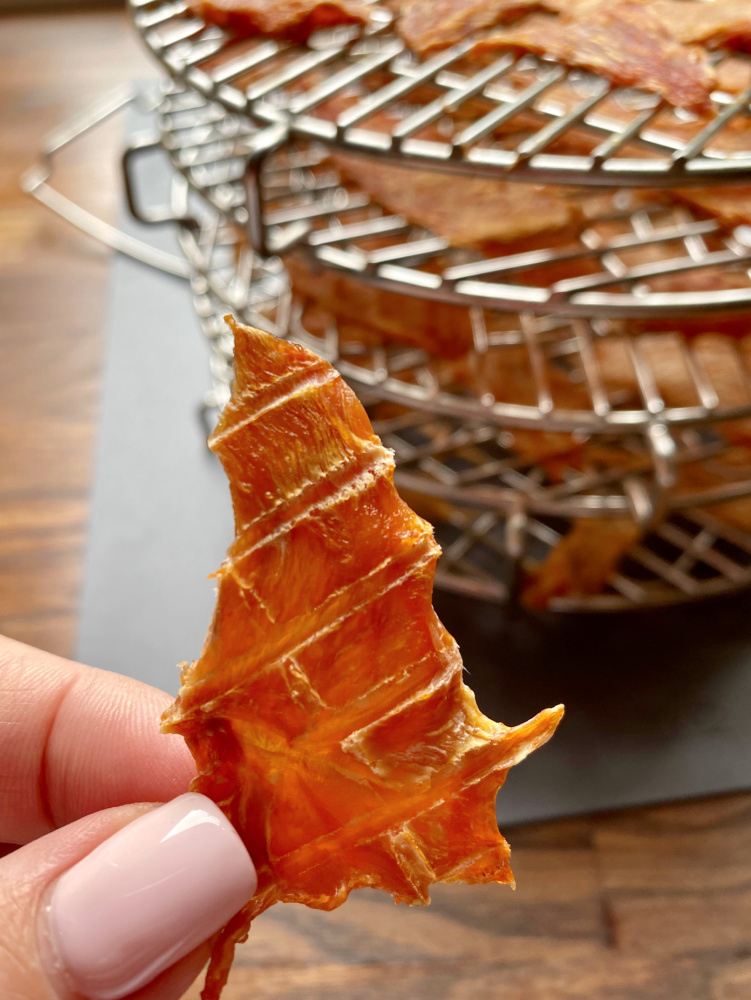
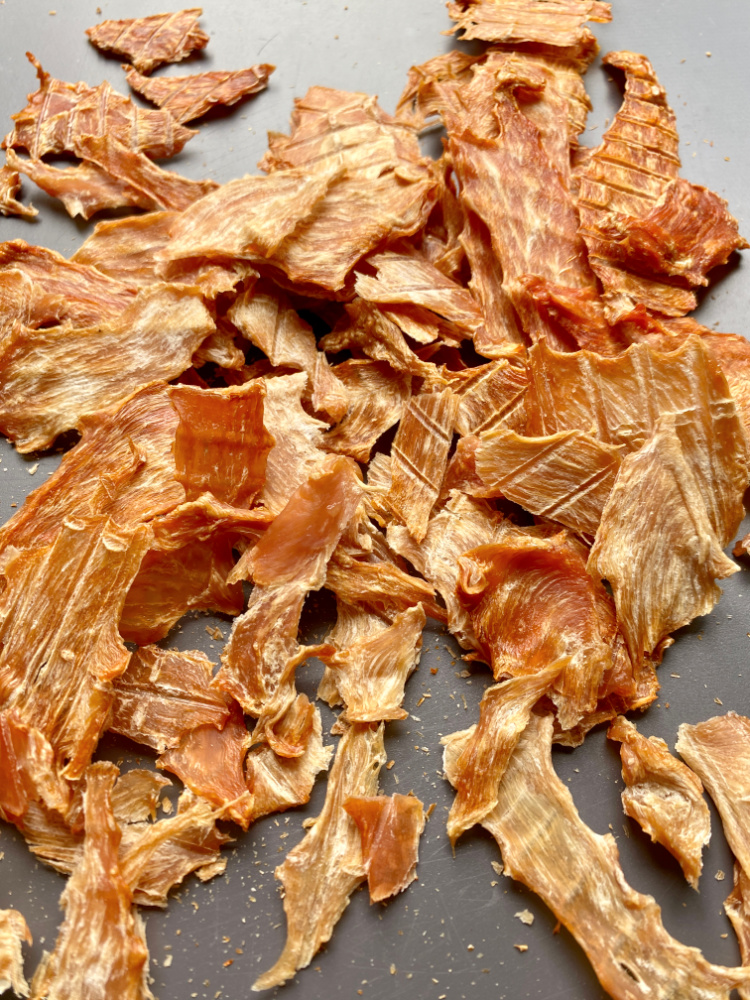
- Check the jerky is done. Take a strip, let it go cold and break the treat. It will either snap or bend – depending on how you cut it – but it should look visibly dry and be the same colour throughout.
- Set the cooking function to bake and the temperature to 150 degrees. Oven blast the jerky for 4 minutes.
How to – In dehydrator
- Cut the chicken breasts into thin slices. You’ll need a super sharp knife and you will get the best results when the meat is partially defrosted.
- Place the chicken slices in a single layer on the dehydrator racks.
- Set the cooking function to dehydrate and the temperature to 70 degrees for at least 8 hours.
- Check the jerky is done. Take a strip, let it go cold and break the treat. It will either snap or bend – depending on how you cut it – but it should look visibly dry and be the same colour throughout.
- Preheat oven to 150C. Place the jerky on a baking tray lined with baking paper and oven blast the jerky for 4 minutes.
How to – In the oven
- Cut the chicken breasts into thin slices. You’ll need a super sharp knife and you will get the best results when the meat is partially defrosted.
- Preheat oven to 70C and line a baking tray with baking paper.
- When the meat is fully defrosted, lay it on a single layer on the baking tray and place in the oven for 8 hours.
- Check the jerky is done. Take a strip, let it go cold and break the treat. It will either snap or bend – depending on how you cut it – but it should look visibly dry and be the same colour throughout.
- Remove the dehydrated chicken from the oven and set the temperature to 150C. When the oven is at temperature, place the chicken back in the oven for 3 minutes.
- Allow to cool before placing in an airtight container with some rice at the bottom to absorb moisture.